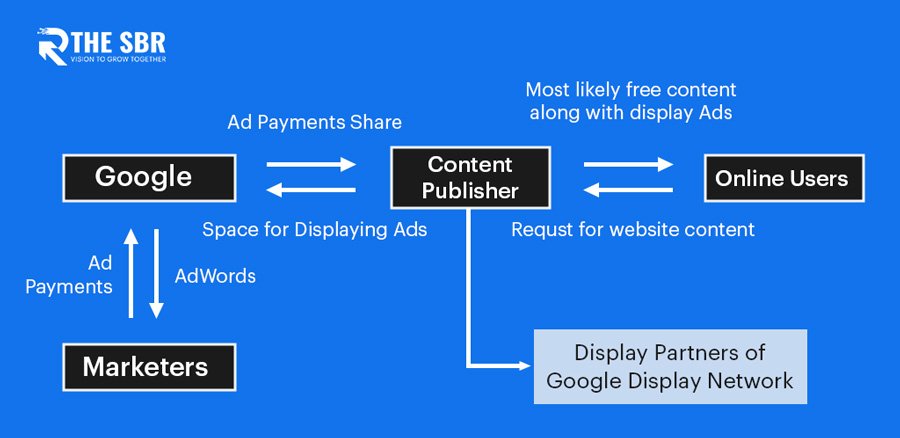
If you’re looking to get your business or website in front of more people, using the Google Display Network (GDN) is a great way to do it. The GDN is a network of over two million websites where your ads can appear, reaching over 90% of Internet users worldwide.
To get started with the GDN, you’ll first need to create a display campaign in Google Ads. This guide will walk you through creating a display campaign and some best practices for getting the most out of the GDN.
What is Google Display Network (GDN)?
The Google Display Network is a network of websites where Google Ads can be displayed. Ads on the GDN are bought on a cost-per-click (CPC) basis, meaning you only pay when someone clicks on your ad.
The GDN can be a great way to reach new customers, as it offers a massive amount of reach (over 90% of global Internet users) and targeting options.
How Does GDN Work?

The Google Display Network matches your ad to websites relevant to your business or product. When you create a display campaign in Google Ads, you’ll need to select your targeting options.
These include things like:
Keywords: Ads will be shown on websites that match your selected keywords. For example, if you sell women’s clothing, you might target keywords like “women’s fashion” or “ladies’ clothes.”
Topics: Ads can also be targeted to specific issues. For example, you could target the “Travel” topic if you sell travel products.
Placements: You can also hand-pick specific websites where you’d like your ads to appear. For example, if you have a blog about food, you might want your ad to appear on food-related websites.
Interests and Remarketing: You can also target people based on their interests or previous interactions with your brand (known as remarketing). For example, if you sell cooking products, you could target people who have shown an interest in cooking or food in the past.
Once you’ve selected your targeting options, your ad will be shown on websites that match those criteria. When someone sees your ad and clicks on it, they’ll be taken to your website or landing page.
Creating a Display Campaign in Google Ads

Now that you know how the GDN works, let’s look at creating a display campaign in Google Ads. The process is similar to starting any other type of campaign in Google Ads, but there are a few key differences that we’ll highlight.
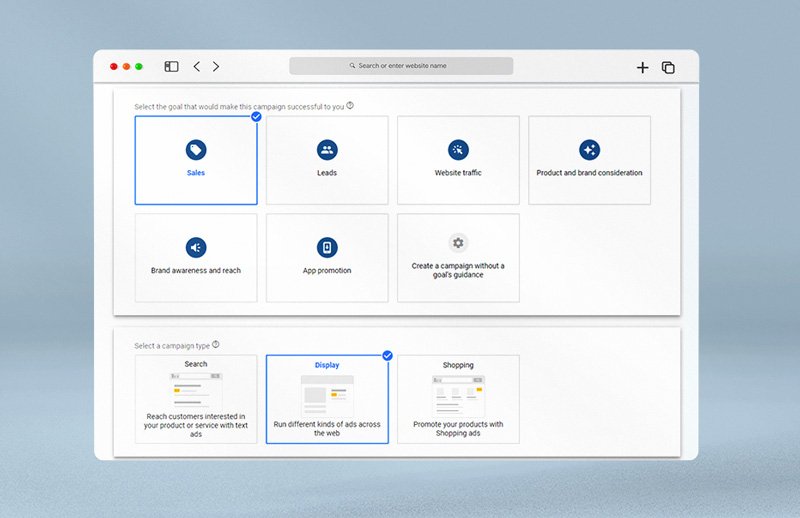
1. Log into your Google Ads account and click on “Campaigns” in the left-hand sidebar. Then, click on the blue “+” button to create a new campaign.
2. You’ll need to select your campaign type on the next screen. For a display campaign, you’ll want to choose “Display” from the drop-down menu.
3. Next, you’ll need to give your campaign a name. This can be anything you like, but it’s a good idea to include the word “display” in the title so you can quickly identify it later on.
4. You’ll need to select your bidding options on the next screen. For a display campaign, you’ll want to choose “CPC” (cost-per-click) from the drop-down menu. CPC is the most common way to buy ads on the GDN, as you only pay when someone clicks on your ad.
5. The next step is to set your budget. You can choose a daily budget or a lifetime budget for your campaign. A lifetime budget is often a good idea for display campaigns, as it’s easier to manage, and you don’t have to worry about your ads being turned off if you hit your daily budget.
6. You’ll need to select your targeting options on the next screen. As we mentioned earlier, there are several different ways you can target your ads on the GDN.
7. Once you’ve selected your targeting options, it’s time to create your ad. You can either create a text ad or a display ad.
Creating a Text Ad
If you choose to create a text ad, you’ll need to provide a headline, two descriptions, and a URL. You’ll also have the option to add images, but this isn’t required.
Creating a Display Ad
If you choose to create a display ad, you’ll need to provide an image (or images), a headline, and a description. You can also add a call-to-action button to your ad, which can be used to encourage people to click on your ad.
8. Once you’ve created your ad, you’ll need to review and submit it for approval. Once your ad has been approved, it will start running on the GDN.
And that’s all there is to it! Creating a display campaign in Google Ads is a reasonably straightforward process, but a few key things to keep in mind.
First, make sure you select the right campaign type (“Display”) when creating your campaign. Second, remember to target your ads carefully – the GDN offers many options, so take advantage of them!
And finally, don’t forget to create both a text ad and a display ad for your campaign. This will help ensure that as many people see your ads as possible.
Read more about Google Display Ads: How to Reach Your Target Audience?
What are the Benefits of Using the GDN for Advertising Campaigns?

The GDN offers a lot of benefits for advertisers, including:
A broad reach: The GDN has over 2 million websites in its network, so your ads have the potential to be seen by a large number of people.
Targeting options: As we mentioned earlier, the GDN offers a variety of targeting options that you can use to ensure that the right people see your ads.
Flexible budget: You can set a daily or lifetime budget for your campaign to control how much you spend.
Easy to use: The GDN is easy to use, even if you’re new to Google Ads. Creating a campaign is a simple process, and there are plenty of resources available to help you get started.
The GDN can be a great way to reach your target audience and promote your product or service. If you’re not already using the GDN for your advertising campaigns, we recommend giving it a try!


